Easy Crochet Beanie: Beginner Step-by-Step Free Pattern
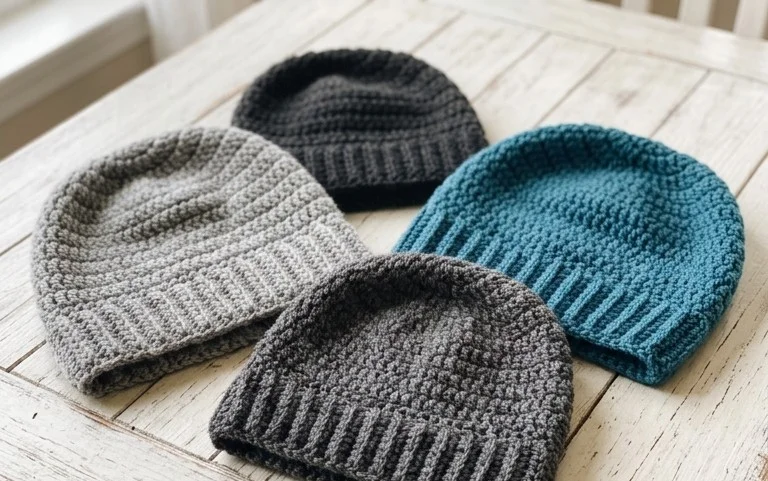
This cozy ribbed hat feels like a warm hug on a blustery afternoon, sitting snugly against your ears without ever slipping. It is a simple rectangle that folds into a beautiful, professional-looking accessory, making it an excellent choice for beginners who want quick, tangible results. By using a basic half double crochet stitch worked into the back loop, you create a stretchy fabric that mimics high-end boutique beanies. You will enjoy watching the texture emerge as you work row by row, providing a meditative rhythm that makes this project a reliable staple for your handmade gift stash.
Why You’ll Love This Pattern
This crochet ribbed beanie pattern uses a simple construction method that turns a flat rectangle into a cozy, fitted hat. You will work back and forth in rows to create the main fabric, which is then seamed to form a tube. The ribbed texture provides significant elasticity, ensuring the hat hugs the head comfortably without feeling too tight. It is an ideal project for clearing out partial skeins of worsted weight yarn, as you only need about 200 yards to complete the adult size. Because the pattern relies on a repeating sequence of stitches, you can finish it in a single weekend while relaxing in front of the television.
I finished this hat in two nights. The ribbing looks like high-end store bought gear and the instructions were very easy to follow for a beginner like me.
— Sarah, hobbyist crocheter
Pattern Overview & Skill Level
- Skill Level: Beginner
- Approximate Time: 4 to 6 hours
- Construction: Worked flat in rows to form a rectangle, then seamed at the side and cinched at the top.
- Finished Dimensions: Fits average adult head circumference of 21-23 inches.
Materials & Supplies Needed
- Yarn: Worsted weight (#4), wool or acrylic blend, approximately 200 yards.
- Hook Size: 5.5 mm (US I-9).
- Notions: Tapestry needle, locking stitch marker, scissors, and a pom-pom maker (optional).
- Safe yarn substitutions: You can use a cotton-acrylic blend for better structure, or a 100% merino wool for extra warmth. Choosing a cotton yarn will result in a slightly heavier hat with less natural stretch, so you may need to increase the foundation chain length by 5-10 stitches to maintain the same fit.
Stitch Guide & Abbreviations (US Terms)
- ch: chain
- st/sts: stitch/stitches
- sl st: slip stitch
- BLO: back loop only. Insert your hook under only the back loop of the stitch instead of both loops.
- hdc: half double crochet. Yarn over, insert hook in st, pull up a loop, yarn over, pull through all three loops on hook.
Step-by-Step Pattern Instructions
Main Hat Body
- Row 1: Ch 41. Hdc in the 2nd ch from hook and in each ch across. (40 sts). Turn.
- Row 2: Ch 1, hdc in BLO of the first st and each st across. (40 sts). Turn.
- Rows 3-60: Repeat Row 2 until the piece measures approximately 18 inches unstretched. Do not fasten off after the final row.
Finishing and Assembly
Fold the rectangle in half by bringing the short ends together. Slip stitch the edges closed by inserting the hook through both the foundation chain edge and the final row edge simultaneously. This creates the side seam of the hat. Fasten off, leaving an 8-inch yarn tail. Thread the tail through a tapestry needle and weave it in and out along the top edge of the tube. Pull the yarn tail tight to cinch the top closed, securing it with a knot on the inside. Weave in all remaining ends securely.
Care & Washing Instructions
- Hand wash in cool water using a mild wool-safe detergent.
- Lay the hat flat on a dry towel to air dry, reshaping it while damp to ensure the ribbing remains even.
- Do not hang the hat to dry, as the weight of the water can stretch the fibers and distort the shape of the brim.
Pro Tips & Common Mistakes to Avoid
Maintain consistent tension throughout the project by keeping your yarn flow steady. If your stitches are too tight, the hat will not have the necessary stretch to fit comfortably; try going up a half hook size if the fabric feels stiff. Always place a stitch marker in the first stitch of every row to ensure you do not accidentally lose a stitch at the end, which is the most common reason for uneven edges. If you wish to adjust the size, add or subtract foundation chains in increments of two, keeping in mind that each change of two chains adds roughly one inch to the total height of the hat.
Frequently Asked Questions
Can I use a different yarn weight for this pattern?
You can use a bulky weight yarn, but you will need to adjust your starting chain length and hook size. Using a different weight will change the drape and elasticity, so it is recommended to work a small gauge swatch first to see how the fabric behaves.
Is this pattern suitable for someone who has never crocheted before?
Yes, this is an excellent first project. It teaches the fundamental half double crochet stitch and the importance of working in the back loops, which is a technique used in many intermediate garment patterns.
Can I sell the finished hats made from this pattern?
You are welcome to sell items made from this design, provided you credit the designer. Please note that you cannot use these written instructions or photographs for your own commercial use.
How do I prevent the seam from looking bulky?
When working your slip stitch seam, keep your tension loose and avoid pulling the yarn tight. Alternatively, you can use a mattress stitch with a tapestry needle to join the edges for a flatter, more seamless finish.
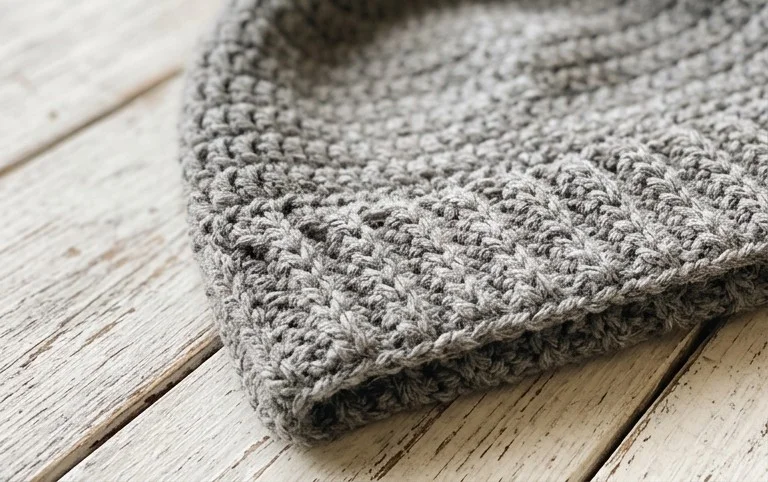
Your finished beanie provides a soft, warm layer that pairs well with any winter coat or casual outfit. You might consider adding a pop of color with a variegated yarn or experimenting with a chunky mohair blend if you prefer a fluffier look for the colder months. Seeing your progress is rewarding, so take a photo and share it with your friends on Instagram to inspire their next project. You can find more free patterns and seasonal ideas on the main blog page for your future hobby sessions.