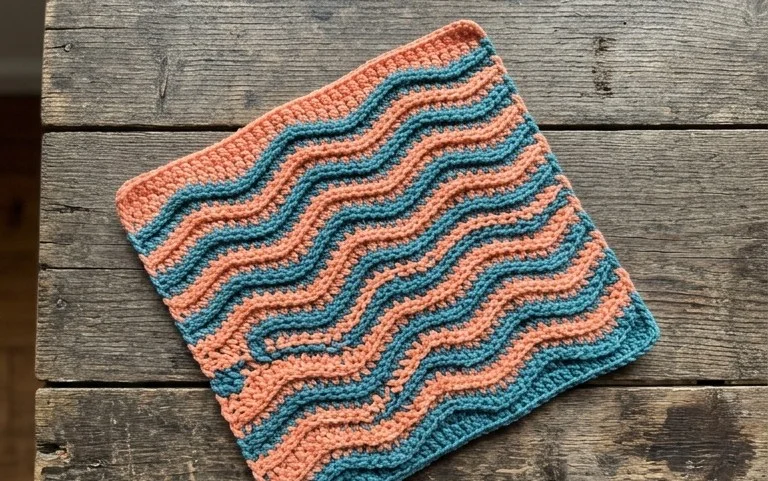
Easy Coral Raised Waves Cotton Dishcloth Free Pattern
This bright coral cotton yarn creates a dense, ridge-like fabric that scrubs away stuck-on food without scratching delicate non-stick pans. Beginners will enjoy how quickly the repetitive rhythmic stitches turn a single ball of yarn into a functional piece of kitchen decor. The raised waves provide an extra layer of thickness that absorbs spills better than a store-bought sponge. You will learn to manipulate basic crochet stitches to build height and texture in each round. This project is a relaxing way to fill an afternoon while creating something you will actually reach for every single day.
Why You’ll Love This Pattern
This beginner-friendly crochet coaster pattern provides a practical way to protect your furniture while practicing basic circular shaping. By using a standard worsted weight cotton yarn, the coasters develop a sturdy, absorbent texture that holds up well against condensation from cold glasses or heat from mugs. You can complete a single coaster in less than thirty minutes, making this an ideal project for using up small amounts of leftover yarn from larger blankets or garment projects. The consistent stitch pattern creates a flat, professional-looking finish that remains circular without the edges curling upward.
I managed to crochet a full set of four coasters in one afternoon. The instructions were easy to follow and my final pieces laid perfectly flat on my coffee table without any blocking needed.
— Sarah, hobbyist crocheter
Pattern Overview & Skill Level
- Skill Level: Beginner
- Approximate Time: 20-30 minutes per coaster
- Construction: Working in continuous rounds starting from a center point
- Finished Dimensions: Approximately 4 inches in diameter
Materials & Supplies Needed
- Yarn: Worsted weight (#4) 100% cotton yarn, approximately 15-20 yards per coaster. Cotton is essential for heat resistance and absorbency.
- Hook Size: 5.0 mm (H-8) crochet hook.
- Notions: Tapestry needle for weaving in ends, a pair of sharp scissors, and a stitch marker to track the start of rounds.
- Yarn substitutions: You may use acrylic yarn for decorative purposes, but note that synthetic fibers will melt if used with very hot mugs and will not absorb water from glass condensation as effectively as cotton.
Stitch Guide & Abbreviations (US Terms)
- ch = chain
- st/sts = stitch/stitches
- sl st = slip stitch
- sc = single crochet
- inc = increase (2 sc in the same stitch)
- MR = magic ring
Step-by-Step Pattern Instructions
Coaster Base
- Rnd 1: Start with a MR. Work 6 sc into the ring. Pull the tail tight to close the center. (6 sts)
- Rnd 2: Work 2 sc in each st around. Place a stitch marker in the first stitch of this round to keep track of your starting point. (12 sts)
- Rnd 3: 1 sc in next st, inc in next st. Repeat from * to * 6 times. (18 sts)
- Rnd 4: 1 sc in each of the next 2 sts, inc in next st. Repeat from * to * 6 times. (24 sts)
- Rnd 5: 1 sc in each of the next 3 sts, inc in next st. Repeat from * to * 6 times. (30 sts)
- Rnd 6: 1 sc in each of the next 4 sts, inc in next st. Repeat from * to * 6 times. (36 sts)
Finishing
Once you complete Round 6, join with a sl st into the first stitch of the final round. Fasten off your yarn, leaving a 6-inch tail for weaving. Use your tapestry needle to weave the tail back and forth through the stitches on the back side of the coaster to ensure the yarn is secure. Trim any excess yarn close to the fabric, being careful not to cut the actual stitches.
Care & Washing Instructions
- Machine wash on a gentle cycle in warm water using a mild detergent.
- Lay the coasters flat on a clean towel immediately after washing to air dry, ensuring they retain their circular shape.
- If the coasters become slightly misshapen, lightly steam them with an iron held a few inches away and pat them flat with your hands to reset the fibers.
Pro Tips & Common Mistakes to Avoid
Maintain consistent tension throughout the project by keeping your yarn tension steady; if your stitches are too tight, the coaster will cup, but if they are too loose, the fabric will be flimsy. Use a stitch marker at the beginning of every round so you do not lose your place during the increases. Weave your ends in by traveling through the underside of the stitches to keep the top surface looking clean and professional. If you want to increase the size of the coaster to act as a placemat, continue the pattern of adding one extra sc between your increases in every subsequent round, which will increase the stitch count by 6 stitches per round.
Frequently Asked Questions
Can I use a different yarn weight for this pattern?
Changing the yarn weight will significantly alter the finished size. Using a thinner yarn like DK will result in a smaller coaster, while using bulky yarn will create a larger, thicker pad.
Why are my edges curling instead of lying flat?
Curling usually happens if your tension is too tight or if you have skipped an increase. Check your stitch counts against the instructions for each round to ensure you have the correct number of increases.
Is this pattern suitable for someone holding a crochet hook for the first time?
Yes, this project is ideal for beginners because it focuses entirely on the single crochet stitch and simple circular growth, requiring no complex counting or changing of colors.
May I sell the coasters I make from this pattern?
You are welcome to sell finished items made from this design, provided you credit the designer in your product listings. Do not redistribute or sell the written pattern itself.
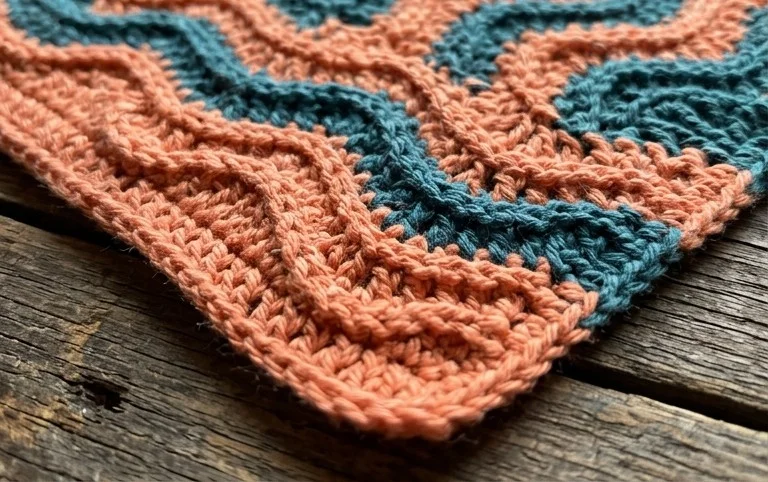
Your new textured kitchen helper looks great hanging on an oven handle or folded neatly beside the sink. Try using a variegated ocean blue yarn next time to emphasize the wave pattern or hold two strands together for a thicker, oversized scrubby. Posting a photo of your finished work helps others see how your unique color choice changes the final look. Check out the rest of the blog for more free patterns to build your collection of handmade household essentials for your home.